Quick start
Fifteen minutes, on a store you can place a test order on. At the end of it a customer can pick a day and a window, you can see the order on a day sheet, and you have seen the preview explain its arithmetic before you trust it with real orders.
1. Enable it, and check the clock
Extensions → Extensions → Modules → Delivery Date → Edit, and turn Status on. Save.
The blue line at the top of the screen tells you which timezone delivery days are worked out in and what the time is there. If that is not your store's timezone, fix it at System → Settings → Local before going any further: every date on every screen below is computed in it.
2. Name the windows you deliver in
A fresh install gives you a working week: Monday to Friday, one window called Delivery, no limits, no preparation time. That is a plain date picker, and it works. The steps below make it yours.
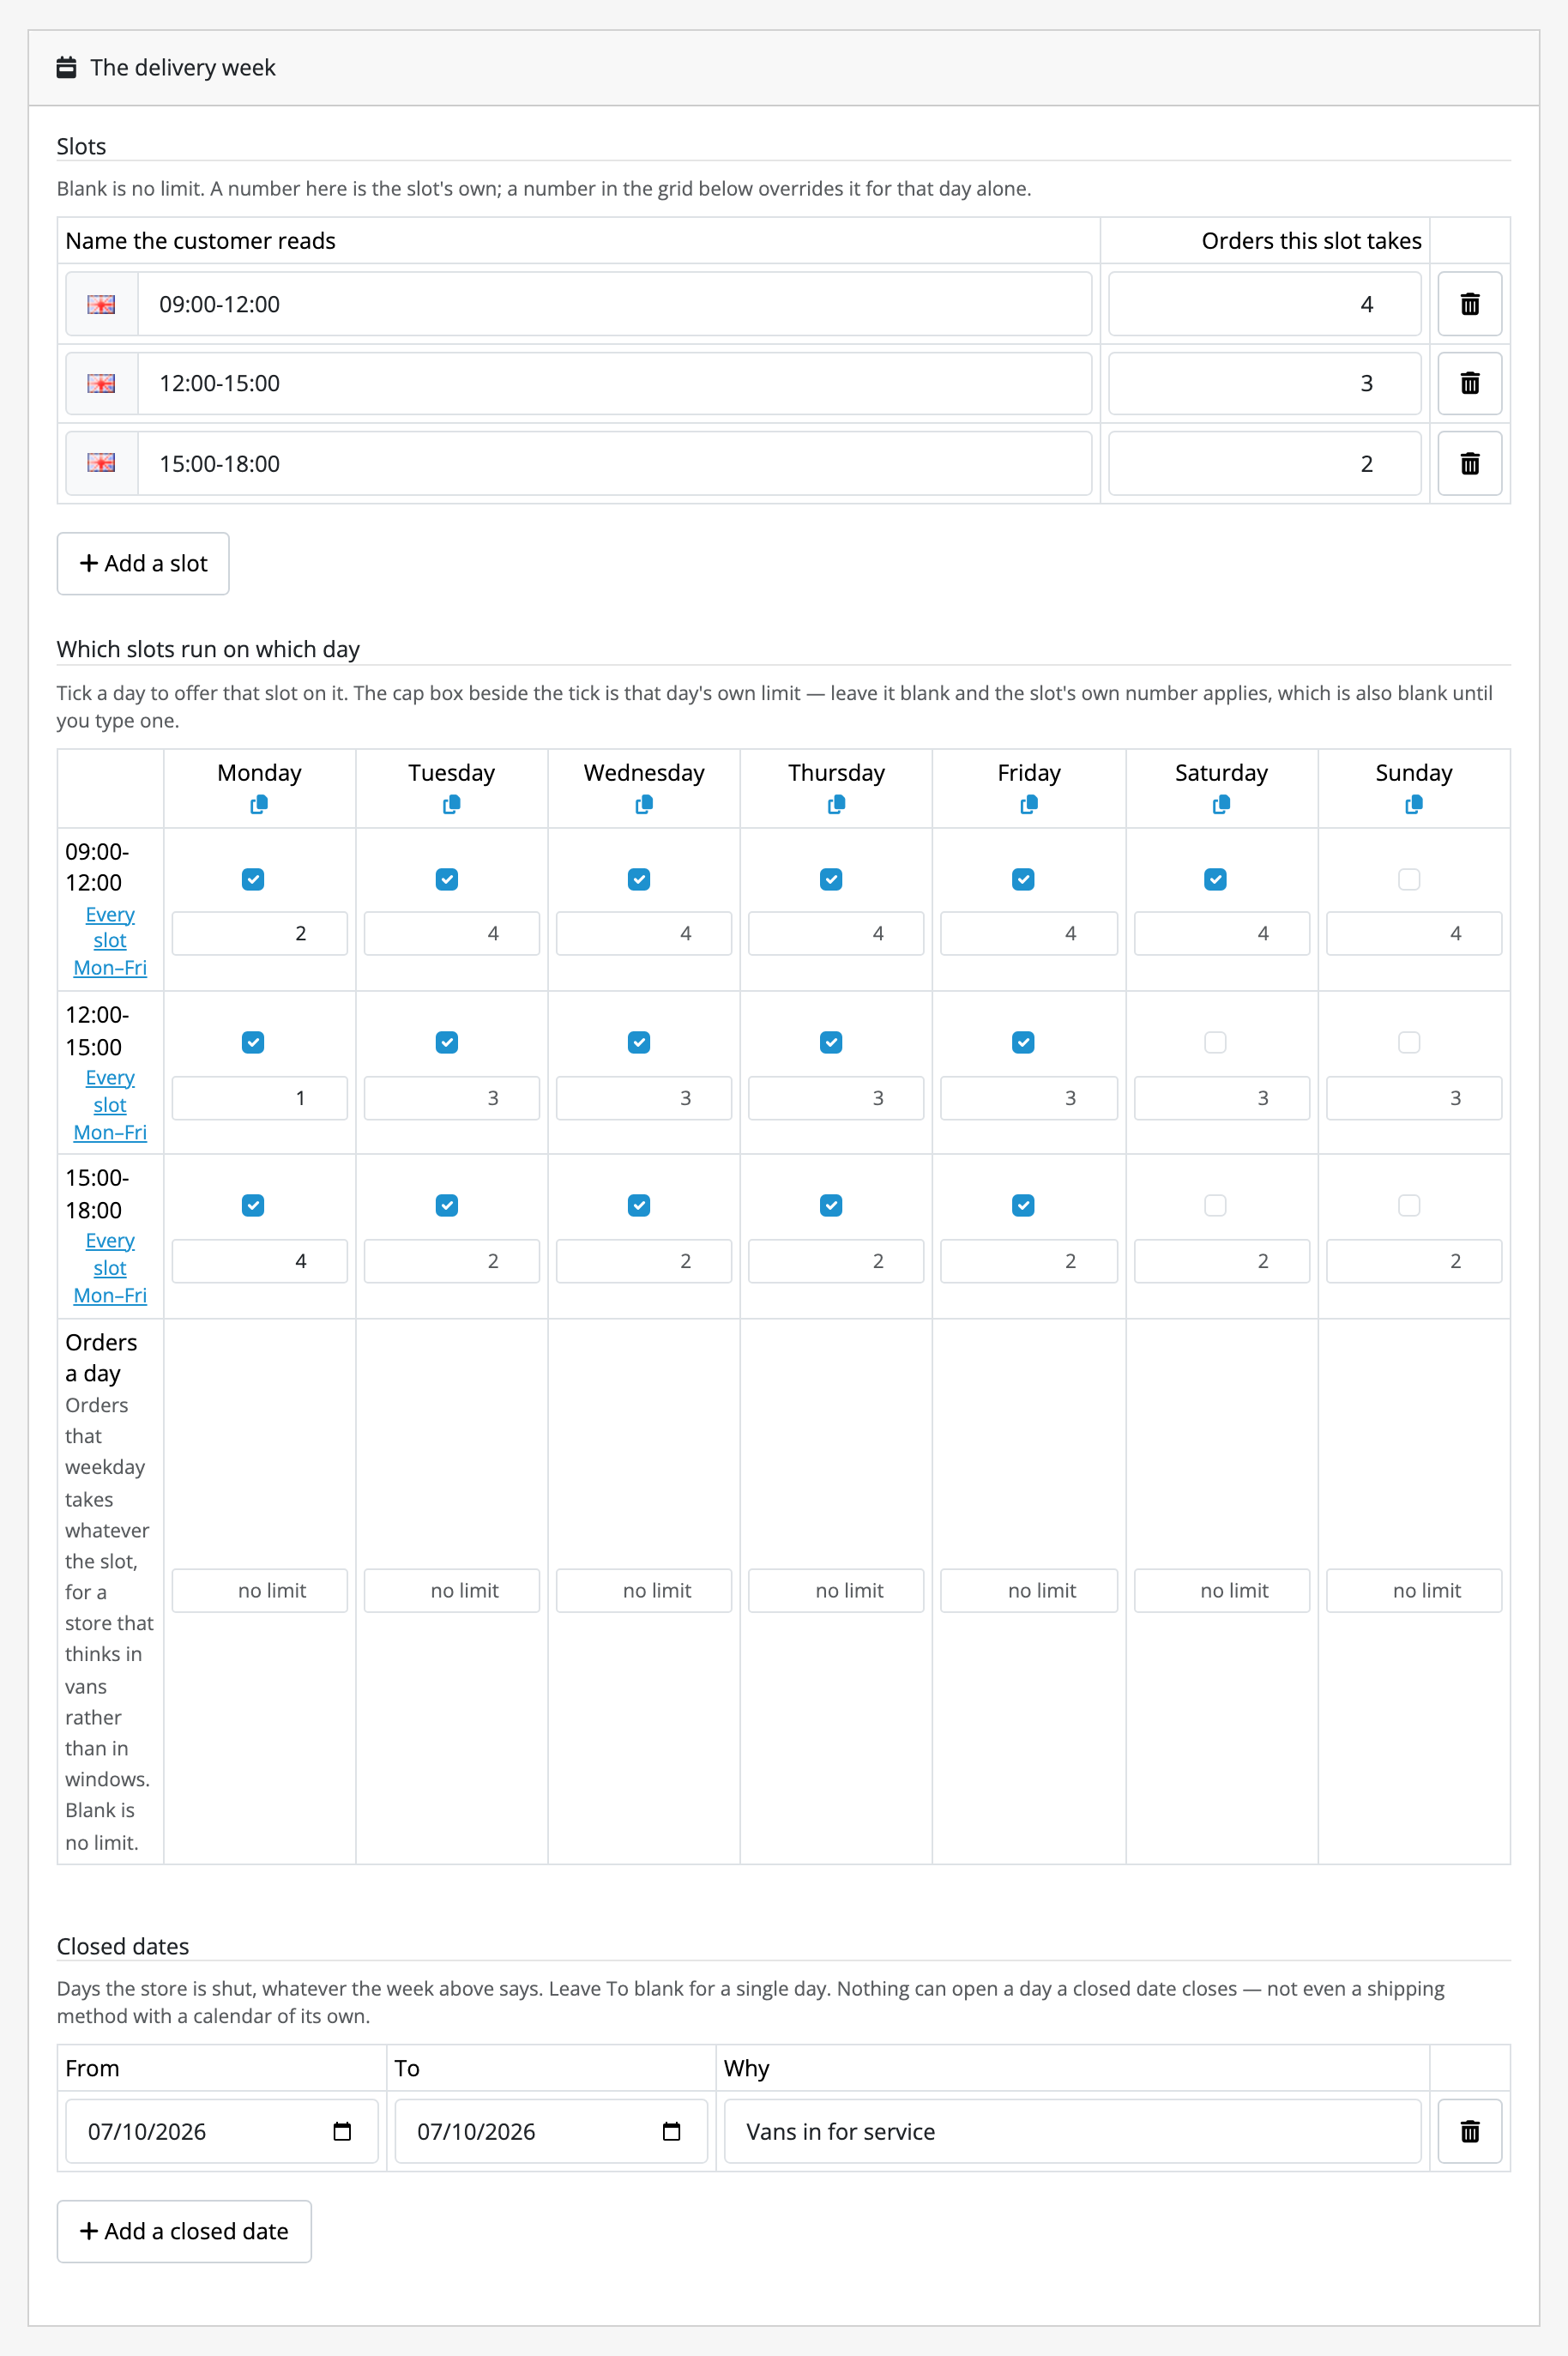
Under The delivery week → Slots, name the windows a customer will read: Morning, Afternoon, 18:00-21:00. Give each one a cap in Orders this slot takes if you have one, and leave it blank if you do not. Blank always means no limit, everywhere on this screen.
Under Which slots run on which day, tick the days each window runs on. The small box beside each tick is that day's own cap, overriding the window's where you type one. Every slot Mon–Fri fills a row in one click.
3. Say how long you need
Under Timing:
- Preparation time: how long before a delivery can go out. Leave it at 0 if you ship the same day.
- Cut-off: the deadline that decides which day's batch an order joins. 15:00 is a common answer. Leave it empty for no deadline at all.
- Take orders up to: how far ahead a customer may book, in calendar days.
4. Watch it explain itself
To the right of the form is What a customer would be offered: the next fortnight, worked out on the server by the same rules the checkout will run, including the numbers you have just typed and not yet saved.
Set Pretend a customer is ordering at to a time just after your cut-off and press Refresh the preview. The line underneath spells out what happened:
Ordered Fri 21 Aug 16:10 → after the 15:00 cut-off, so it joins the next day's batch → batch day Sat 22 Aug → +2 delivery days of preparation → earliest offered Tue 25 Aug.
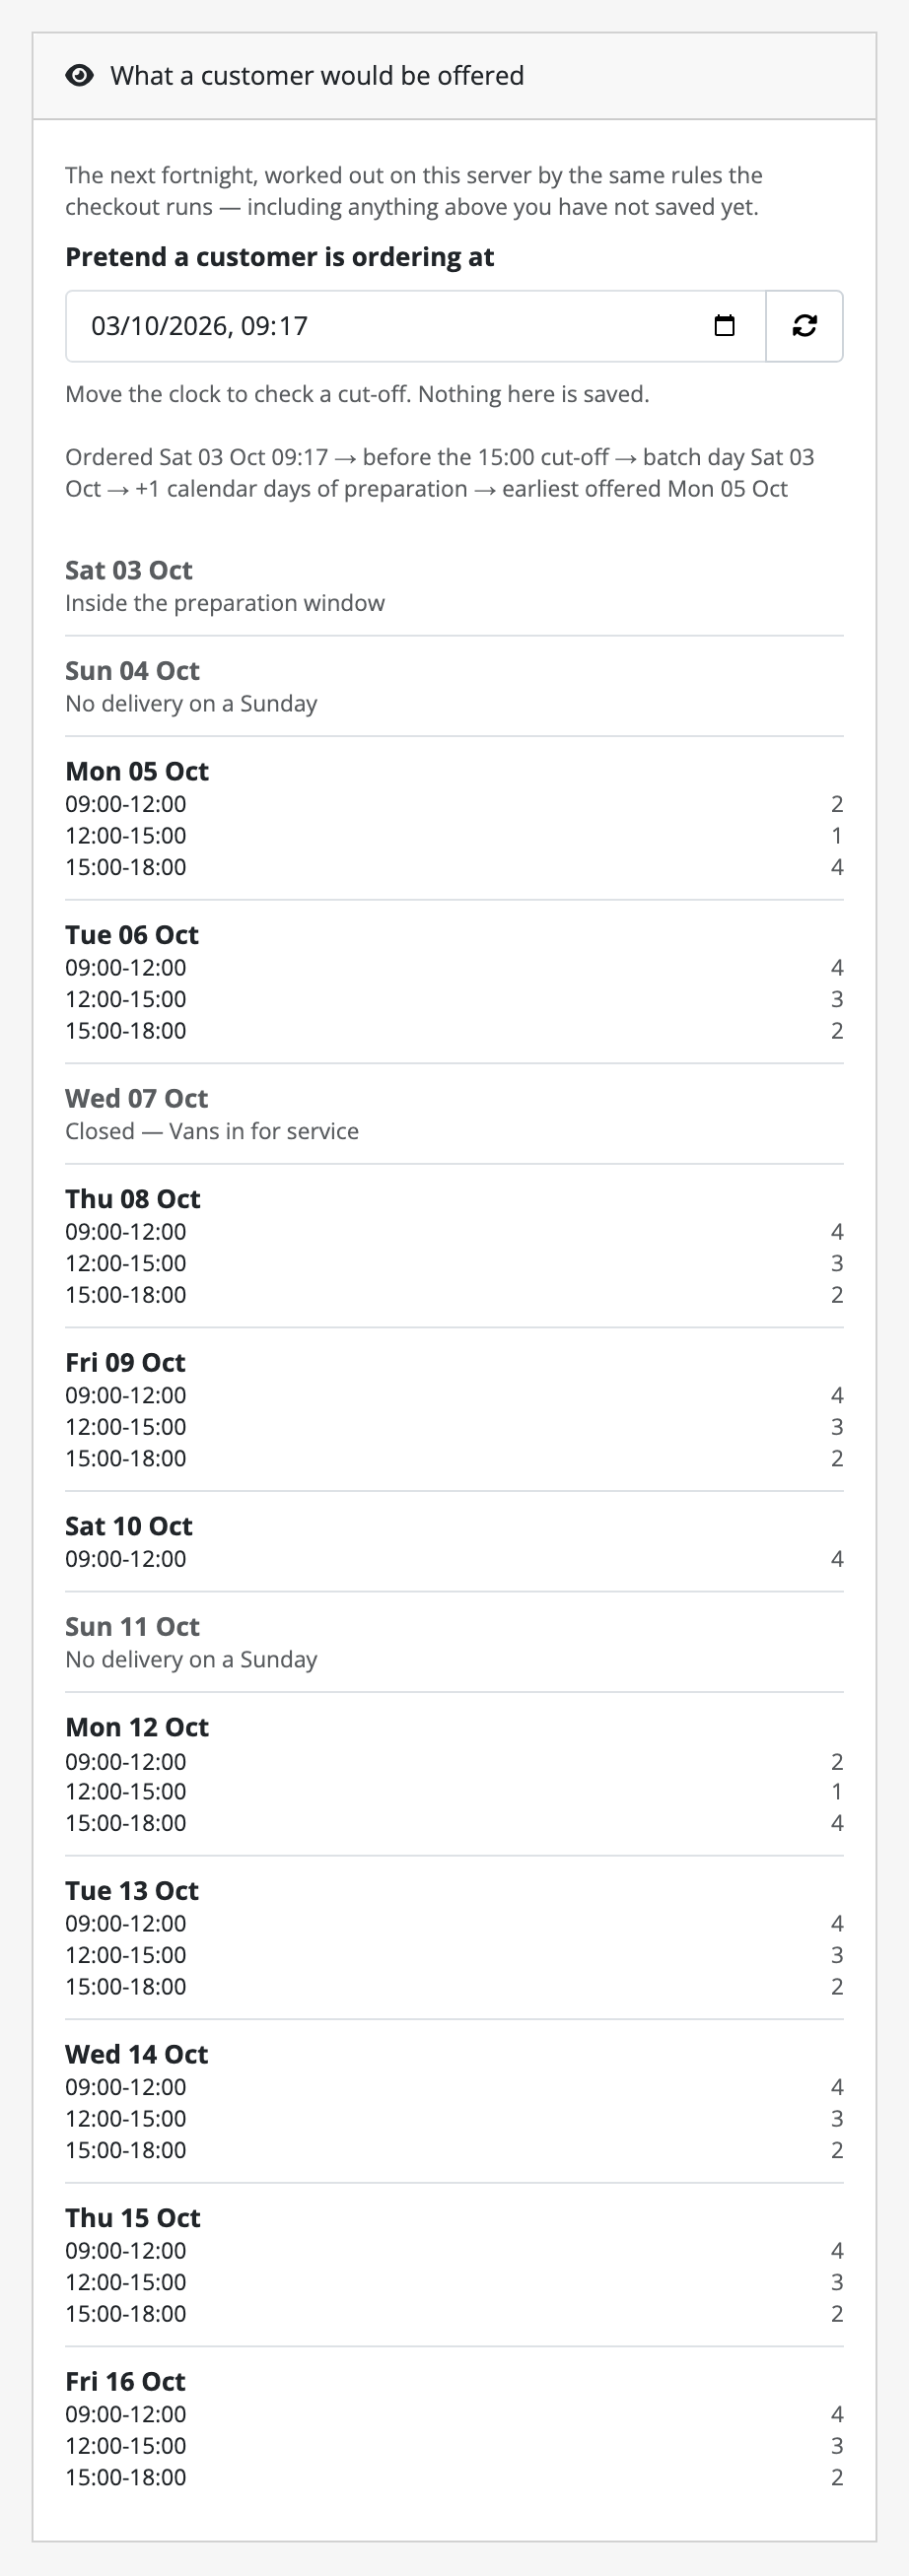
Every day it will not offer says why beside it: No delivery on a Sunday, Closed, Inside the preparation window, Beyond the 30 days ahead you take orders for. If a day you expected is missing, this screen tells you which rule removed it.
Save when the preview matches the way your store works.
5. Place a test order
Add anything to the basket, go to checkout, and pick a shipping method. Under the shipping methods is Choose a delivery date: the days that work, six at a time unless you change Days shown before Show more, weekday name first, with Show more dates for the rest. Pick a day and a window and place the order.
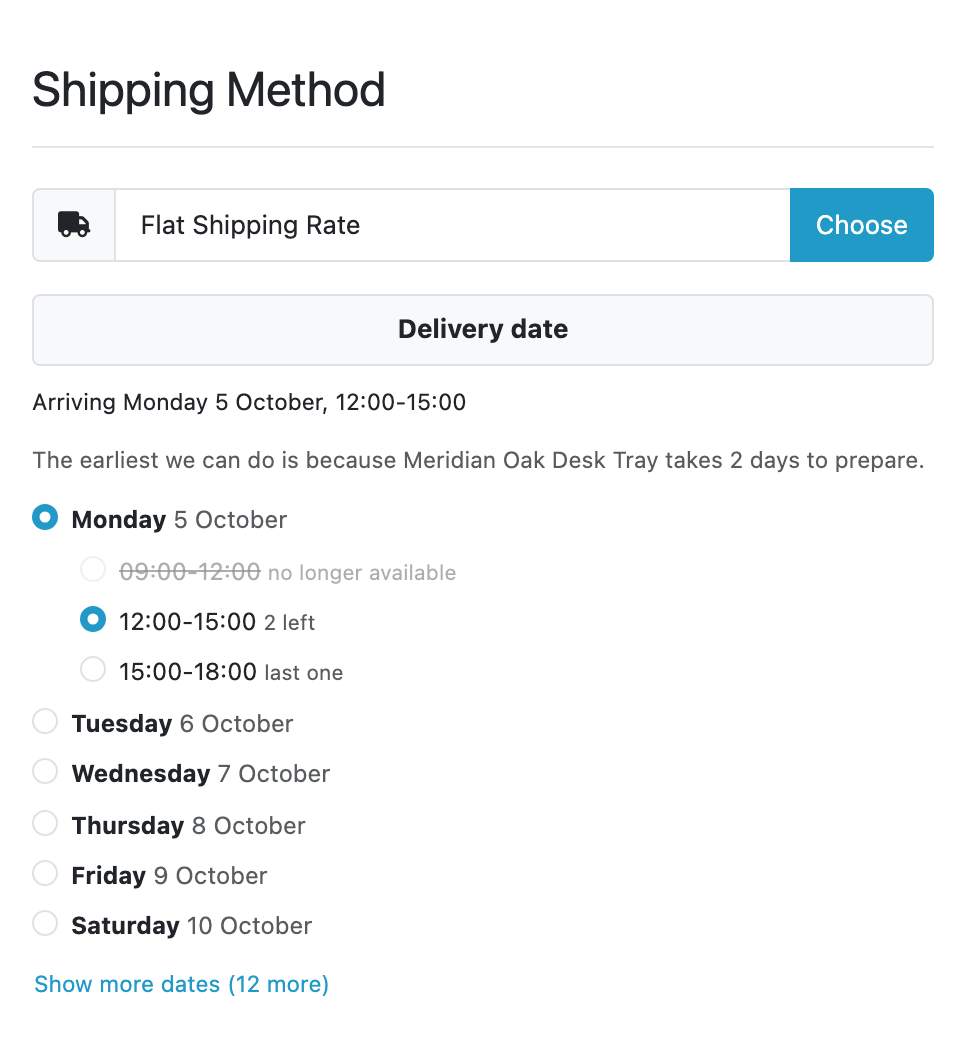
A window that is full is struck through as no longer available rather than hidden, and last one or 2 left appears where a window is nearly gone.
6. Read the day back
Sales → Delivery Days. The top half is the week, every window against its capacity, so you can see at a glance which day is filling up. Click a day and the bottom half is that day's sheet, grouped by window: order id, customer, where it is going, phone, item count, status, and their delivery instructions.
Print the sheet produces the document that goes into the warehouse, with the full street address and a tick column, which the screen deliberately does not show. Export the day (CSV) is the same day as a file.
Where to go next
- Guides: capping a day, closing for a holiday, giving Pickup its own Saturdays, and telling the store a product takes a week to make.
- Limits and guarantees: the promise Delivery Date makes to your customers, and everything it deliberately does not do.