Quick start
The whole loop on one order, in about fifteen minutes: a customer asks, you decide, and they get told. Do it on a test order rather than a real one, because the last step issues real store credit.
You need Returns Portal installed and enabled, and your user group granted the queue permission. See requirements and install.
1. Tell it what a finished order looks like
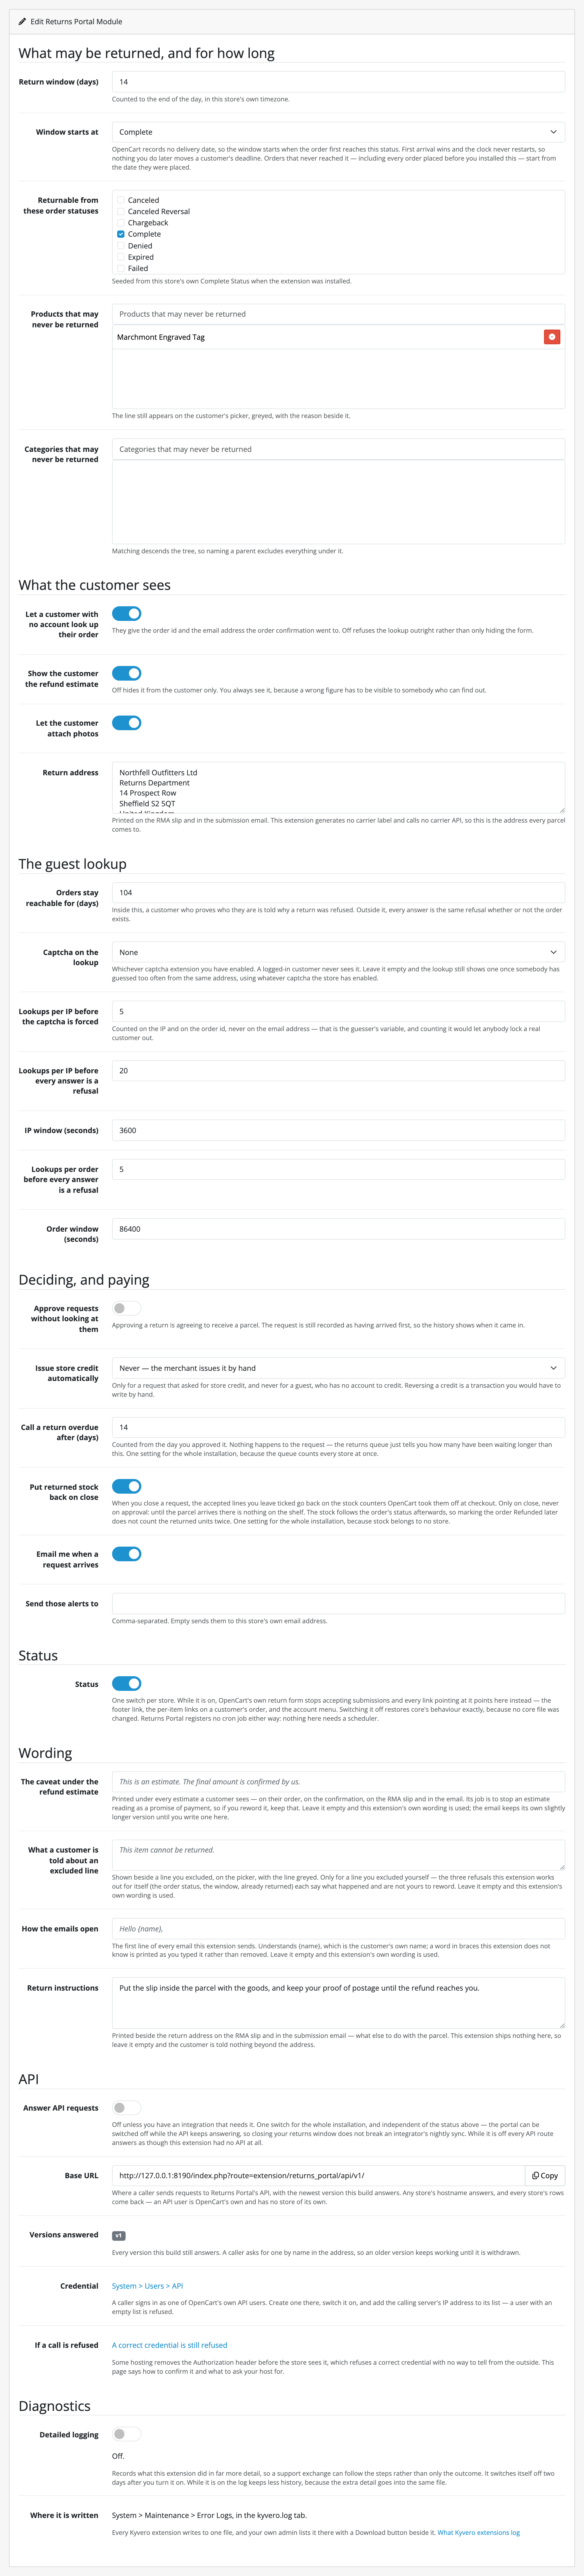
Open Extensions → Extensions → Modules → Returns Portal.
Two fields decide everything else, and the defaults are guesses about your store rather than answers:
- Returnable from these order statuses. Seeded from your store's own Complete Status, which is the same question you have already answered once.
- Window starts at. Leave it at (the date the order was placed) and the window runs from the order date, which is always stricter. Set it to the status you use for delivered and the window runs from the first time an order reached it.
Set Return window (days) to something you can wait out while testing; 14 days is the default. Fill in Return address, and Return instructions in the Wording panel further down: both are printed on the slip and in the customer's email, and the whole return runs through them, because Returns Portal generates no carrier label. The instructions sit in the wording panel because they are a sentence to a customer and so are written per language; the address is a place and is not.
Save.
2. Find an order to send back
Any real or test order in one of the statuses you just allowed. Note its number and the email address on it.
If the order is not in one of those statuses, change it in Sales → Orders first. The portal reads the order's current status, not what it was.
3. Ask for a return, as the customer
Open your storefront and click Returns in the footer. That link used to point at OpenCart's own form; while the module is enabled it points here.
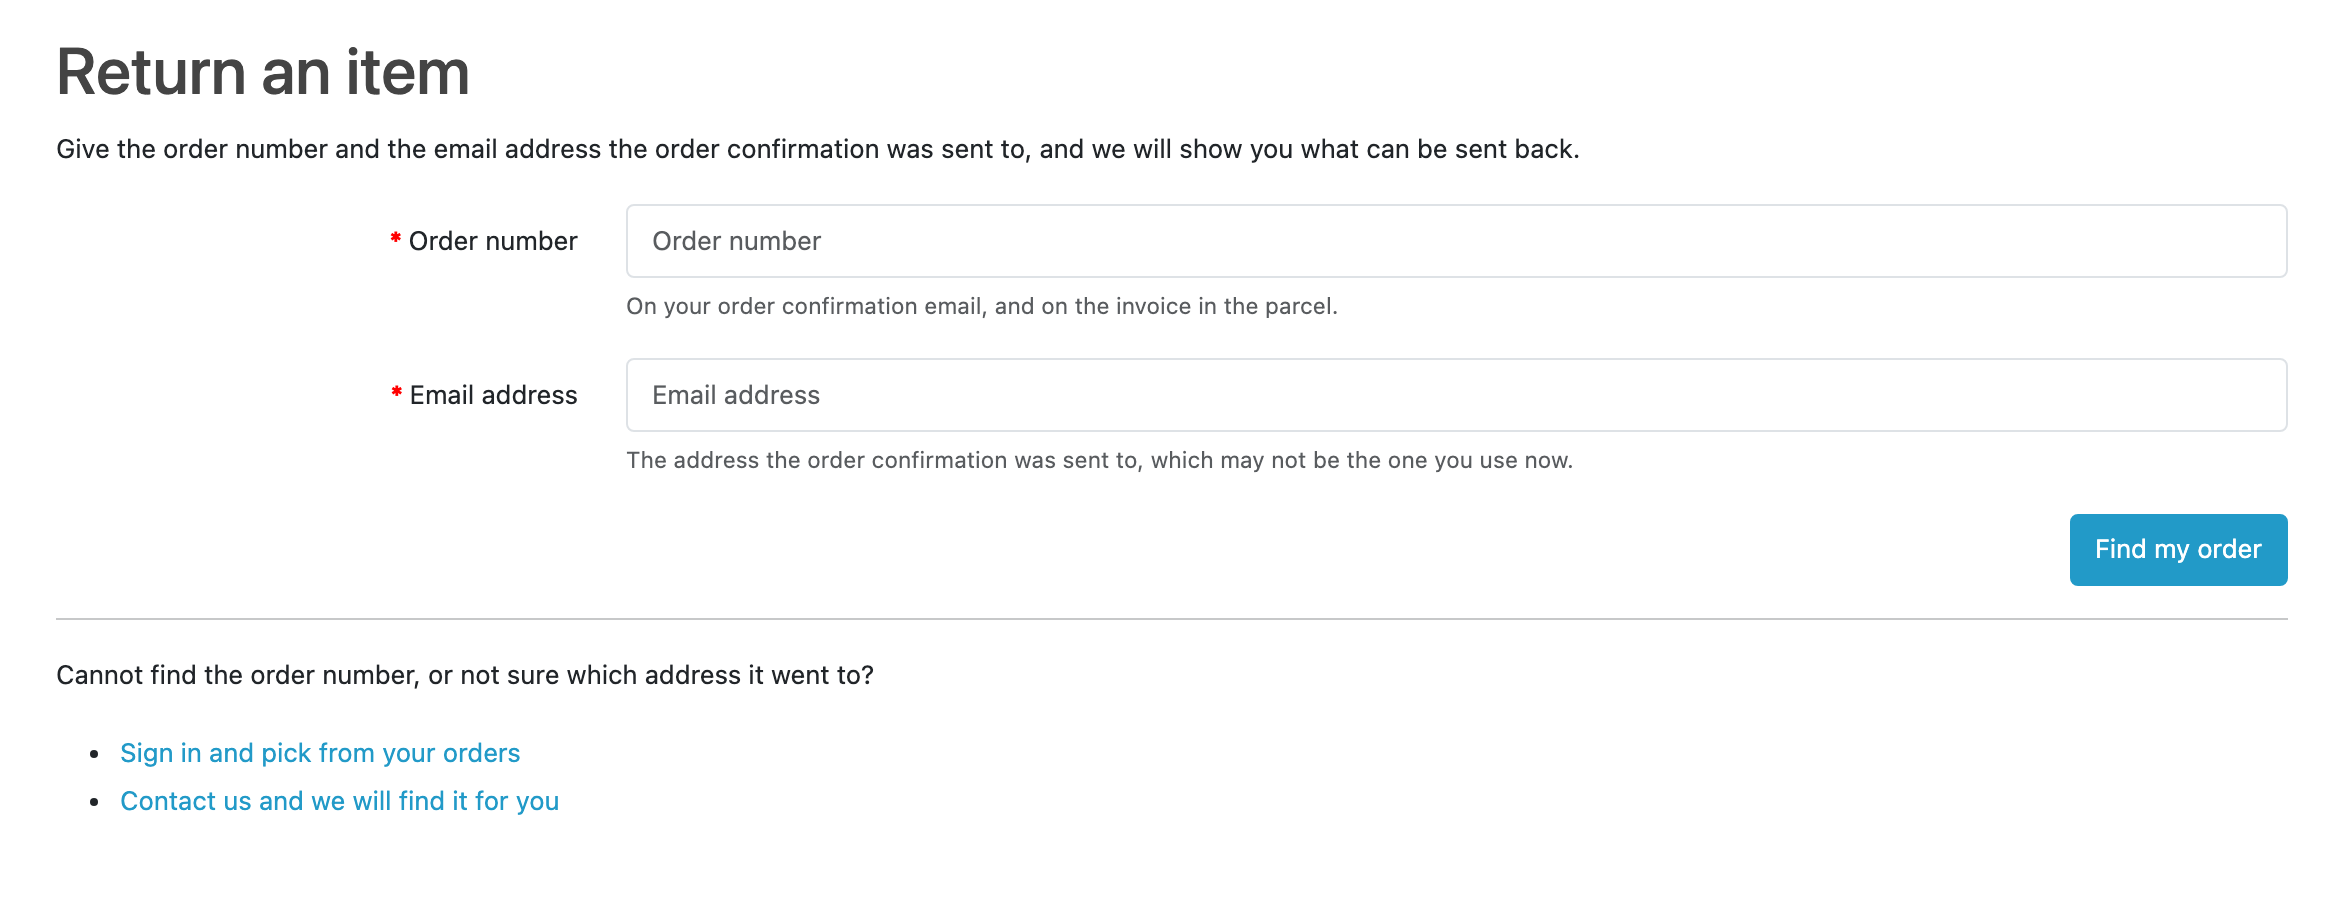
Type the order number and the address the order confirmation went to, and continue. The portal shows every line of the order: the ones that may come back with a quantity picker, and the ones that may not, greyed with the reason printed on them.
Pick a line, give it a reason, choose a resolution (Store credit, so the last step has something to do) and press Send this request.
You land on a confirmation screen with the RMA slip beside it, overprinted NOT YET APPROVED — DO NOT POST. The slip exists immediately so the customer has it, and the overprint says plainly that nobody has agreed yet.
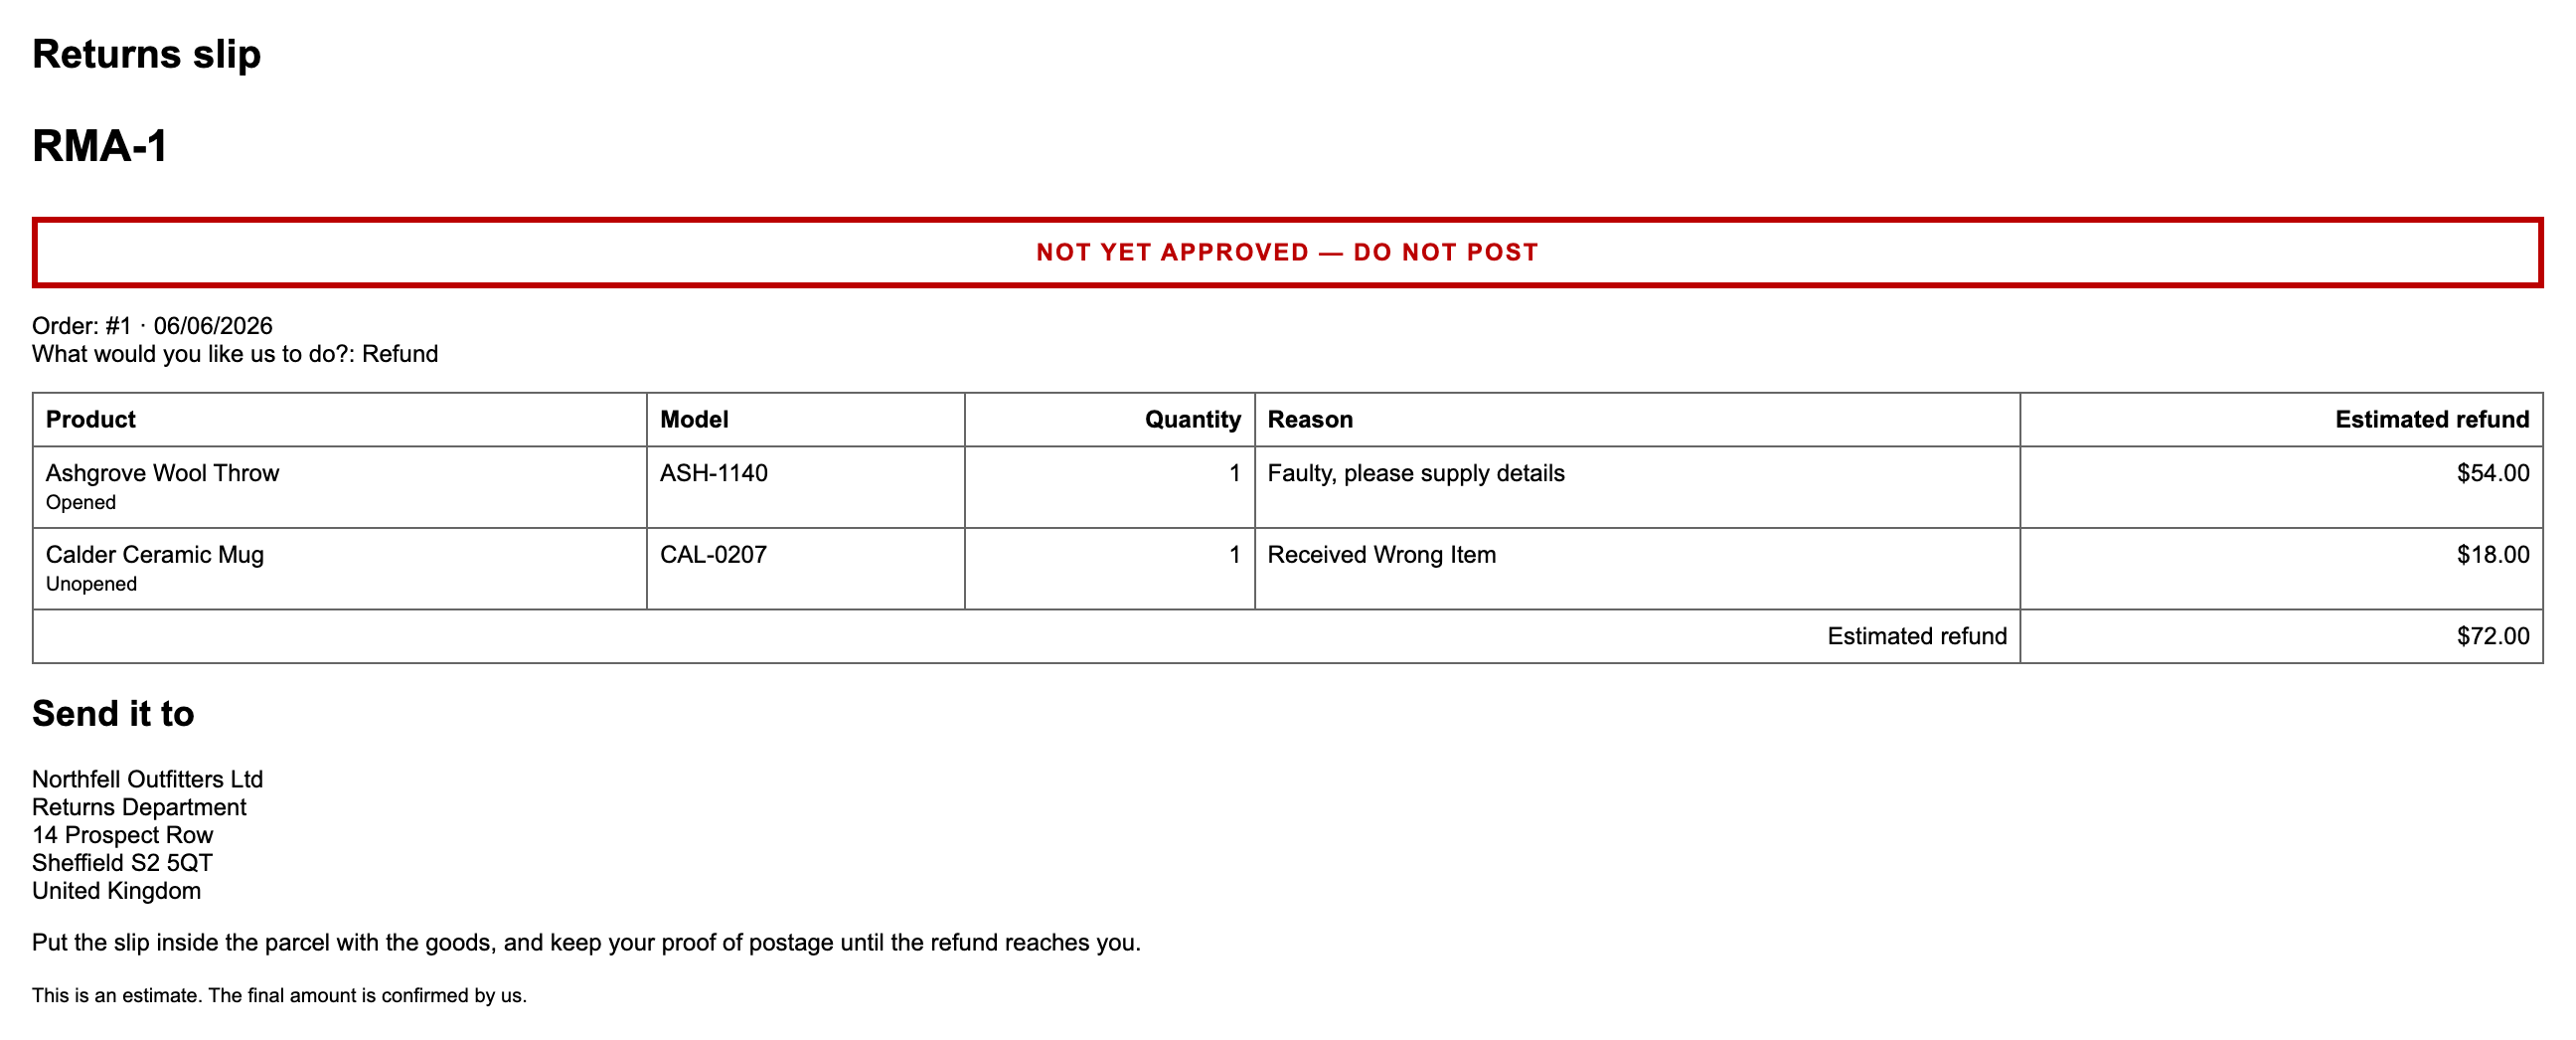
Check the inbox for that address. The submission email carries the same lines, the same estimate and the same slip. For a guest that email is the only copy of the request that will ever exist.
4. Decide it
Back in the admin, open Sales → Return Requests. Your request is on the Needs a decision tab.
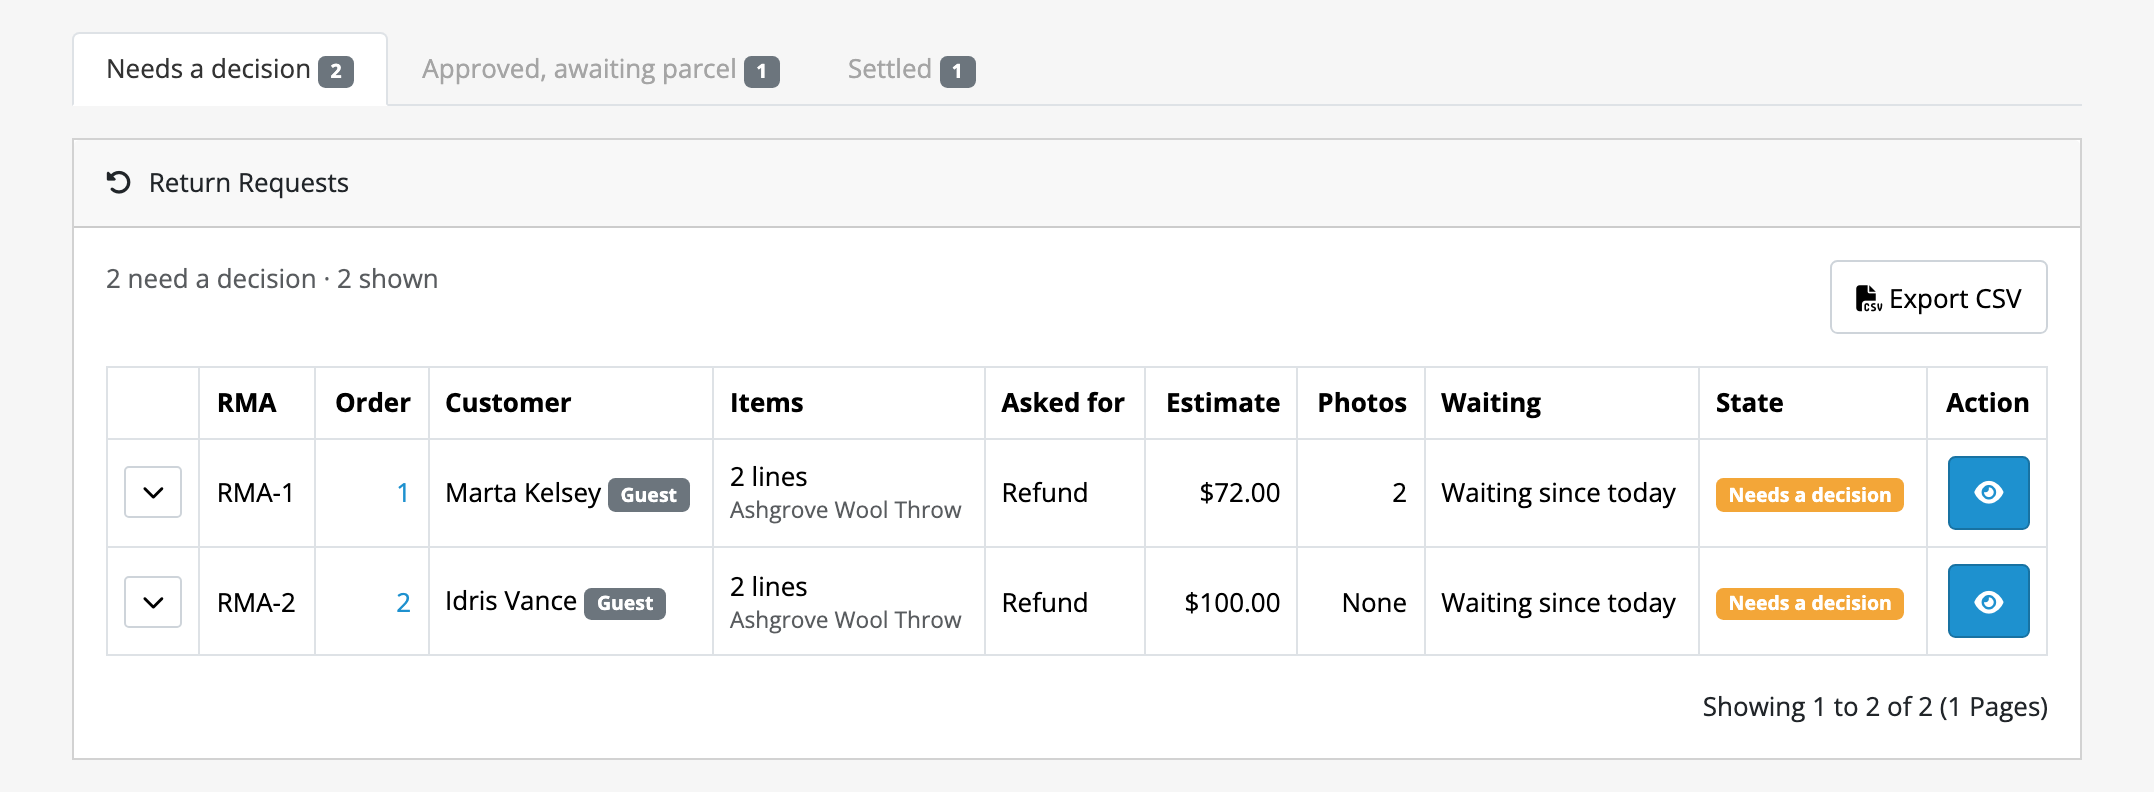
Open it. You get the lines, the customer's reasons, any photos inline, and the estimate with its breakdown: subtotal, share of any order discount, tax.
Set one line to Refuse if the request has more than one, and the screen shows you two figures rather than one: what you are accepting now, and the request total demoted beneath it.
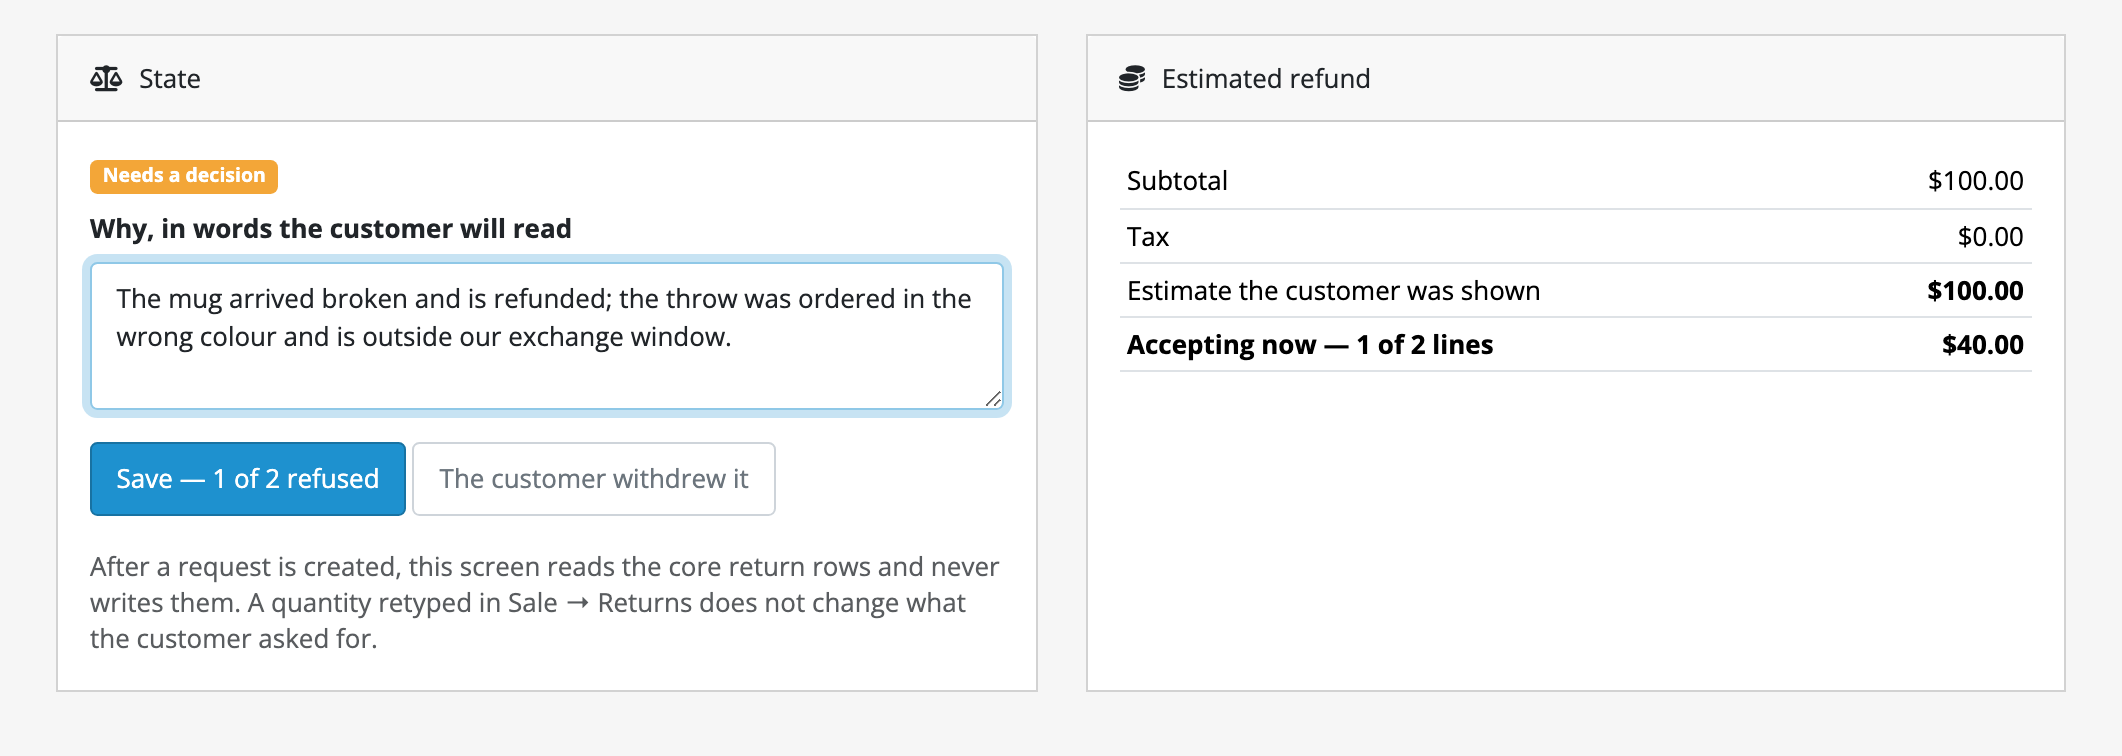 Save the decision with a comment. The customer
is emailed the outcome, per line.
Save the decision with a comment. The customer
is emailed the outcome, per line.
Reload the slip on the storefront: the overprint is gone.
5. Pay it
On an approved request whose customer has an account, Issue store credit appears with the accepted total already filled in. The figure is editable, and both it and the estimate are recorded. One click writes it to their balance and emails them.
A guest sees no such button, and that is deliberate: a guest has no balance to credit, and matching a guest order to an account by email would let anybody who passed the lookup move value into a stranger's account.
Check Customers → Customers → Edit → Transactions: the credit is there, against no order, which is what stops OpenCart's own Remove commission action taking it away again.
6. Close it
When the parcel arrives, open the request and Close it. That is the end of the lifecycle: accepted lines stay held against the order so nothing can come back twice, and nobody is emailed, because they were already told you accepted it.
What to do next
- Decide whether the customer should see the estimate at all, and whether requests should be approved automatically. Both are on the settings screen, and both are set per store. Guides covers what each one costs.
- Read limits and guarantees before you point real customers at it. The section on what this changes about your store is the one your support inbox will care about.