Quick start
The whole loop on one order, in about twenty minutes: an order reaches a status, the customer is emailed, they write a review, you approve it, and it appears with a verified-purchase badge. Do it on a test order with an address you can read, because the third step sends a real email.
You need Review Requests installed and enabled, and your user group granted its permission. See requirements and install.
1. Finish the setup
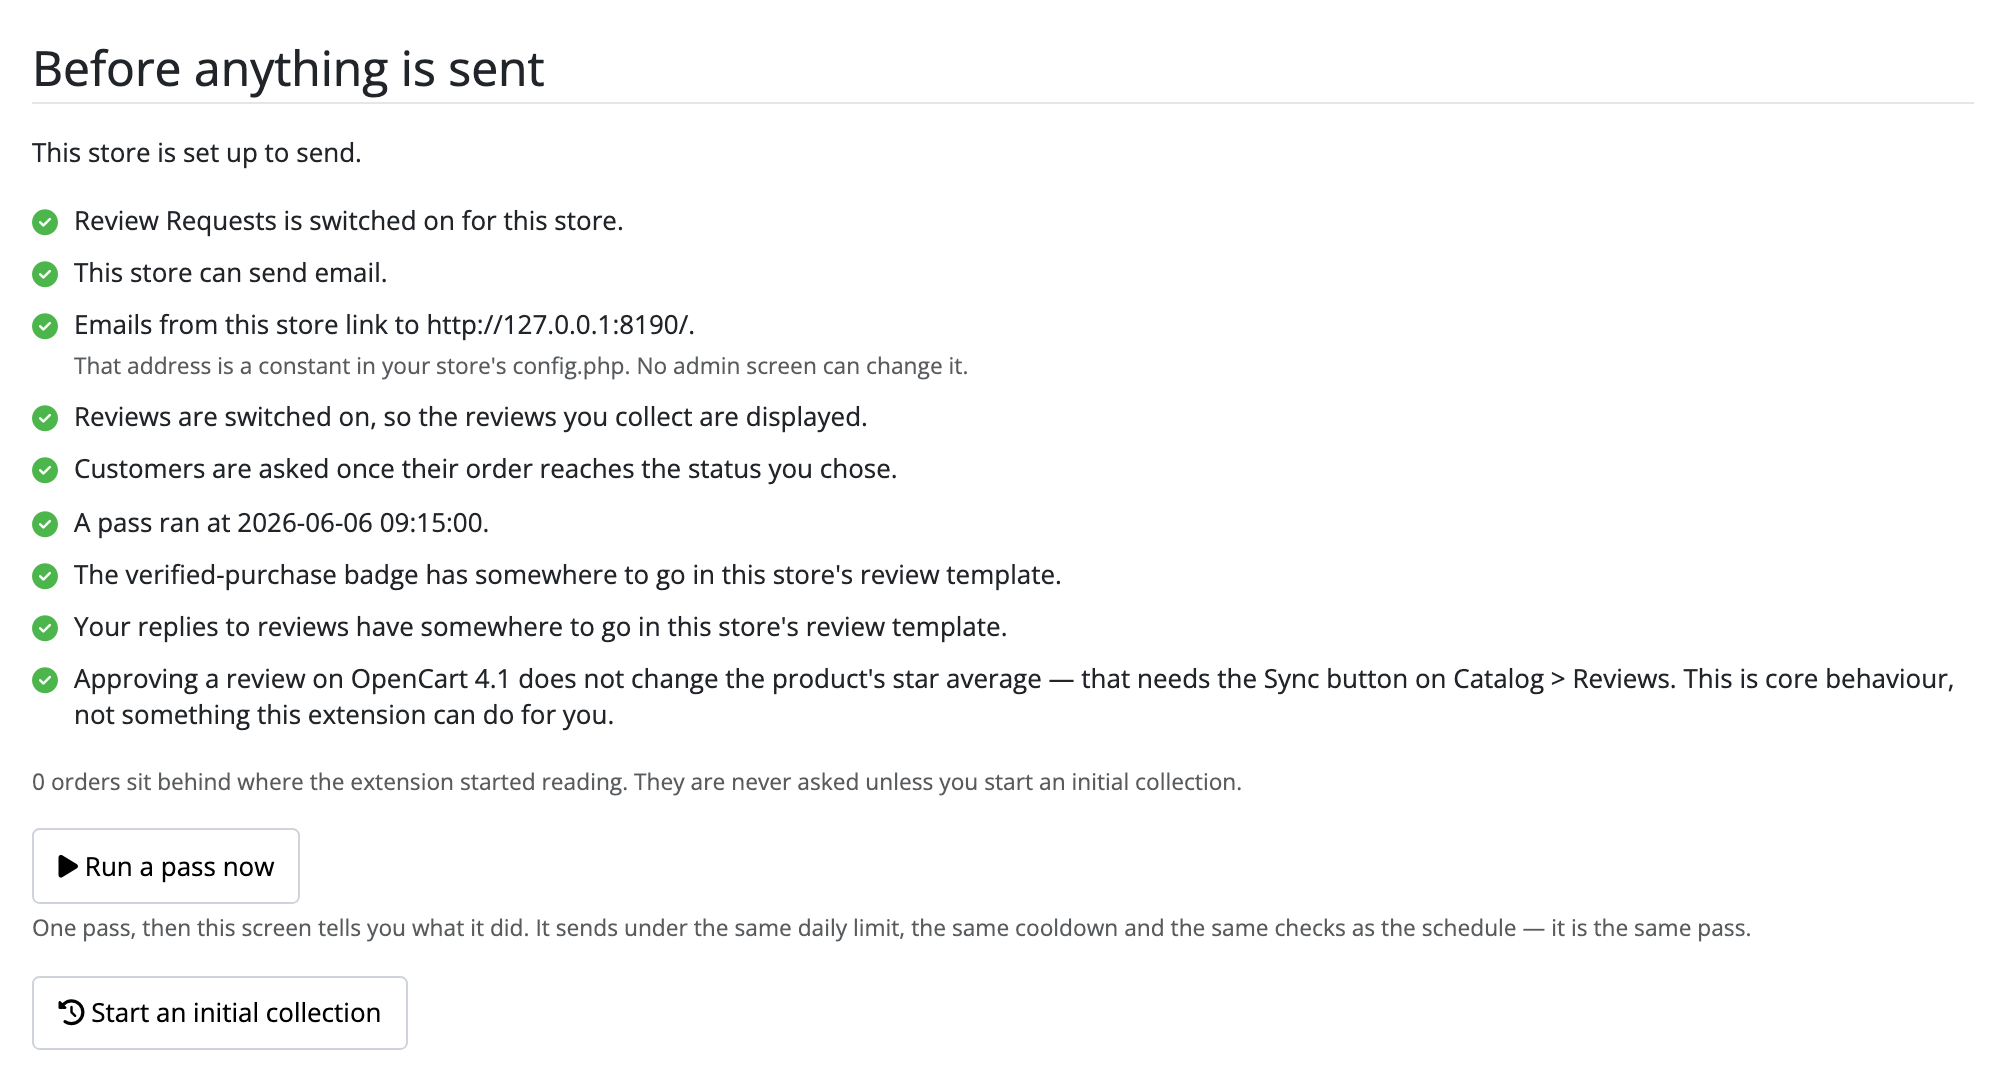
Open Extensions → Extensions → Modules → Review Requests and read the Before anything is sent checklist at the top of the Settings tab. Every line that will not tick names the screen that fixes it. On a store that has just been installed, the mail engine is usually the first one.
Two fields decide the rest, and only one of them has a sensible default:
- Ask after this order status. There is no default on purpose. Choose a status every fulfilled order reaches: Complete on a stock OpenCart store. See choosing the trigger status before you pick anything else.
- Wait before asking (days). 14 by default, which is long enough that the
parcel has arrived. Set it to
0for this walkthrough, so your test order is due immediately.
Save. A store that is set up to send looks like this, and every line that will not tick names the screen that fixes it:
2. Give it an order
Place a test order, or take an existing one, and move it to the status you just chose using Sales → Orders. Nothing else is needed: the extension reads your order history for orders that reached that status.
Only status changes made from now on count. Orders that were already at that status sit behind where the extension started reading, and the Settings tab says how many. They are never emailed unless you deliberately start an initial collection.
3. Send it
Press Run a pass now on the Settings tab. It is the same pass the schedule runs, under the same daily limit and the same checks, and it tells you afterwards what it found, sent, skipped and failed on.
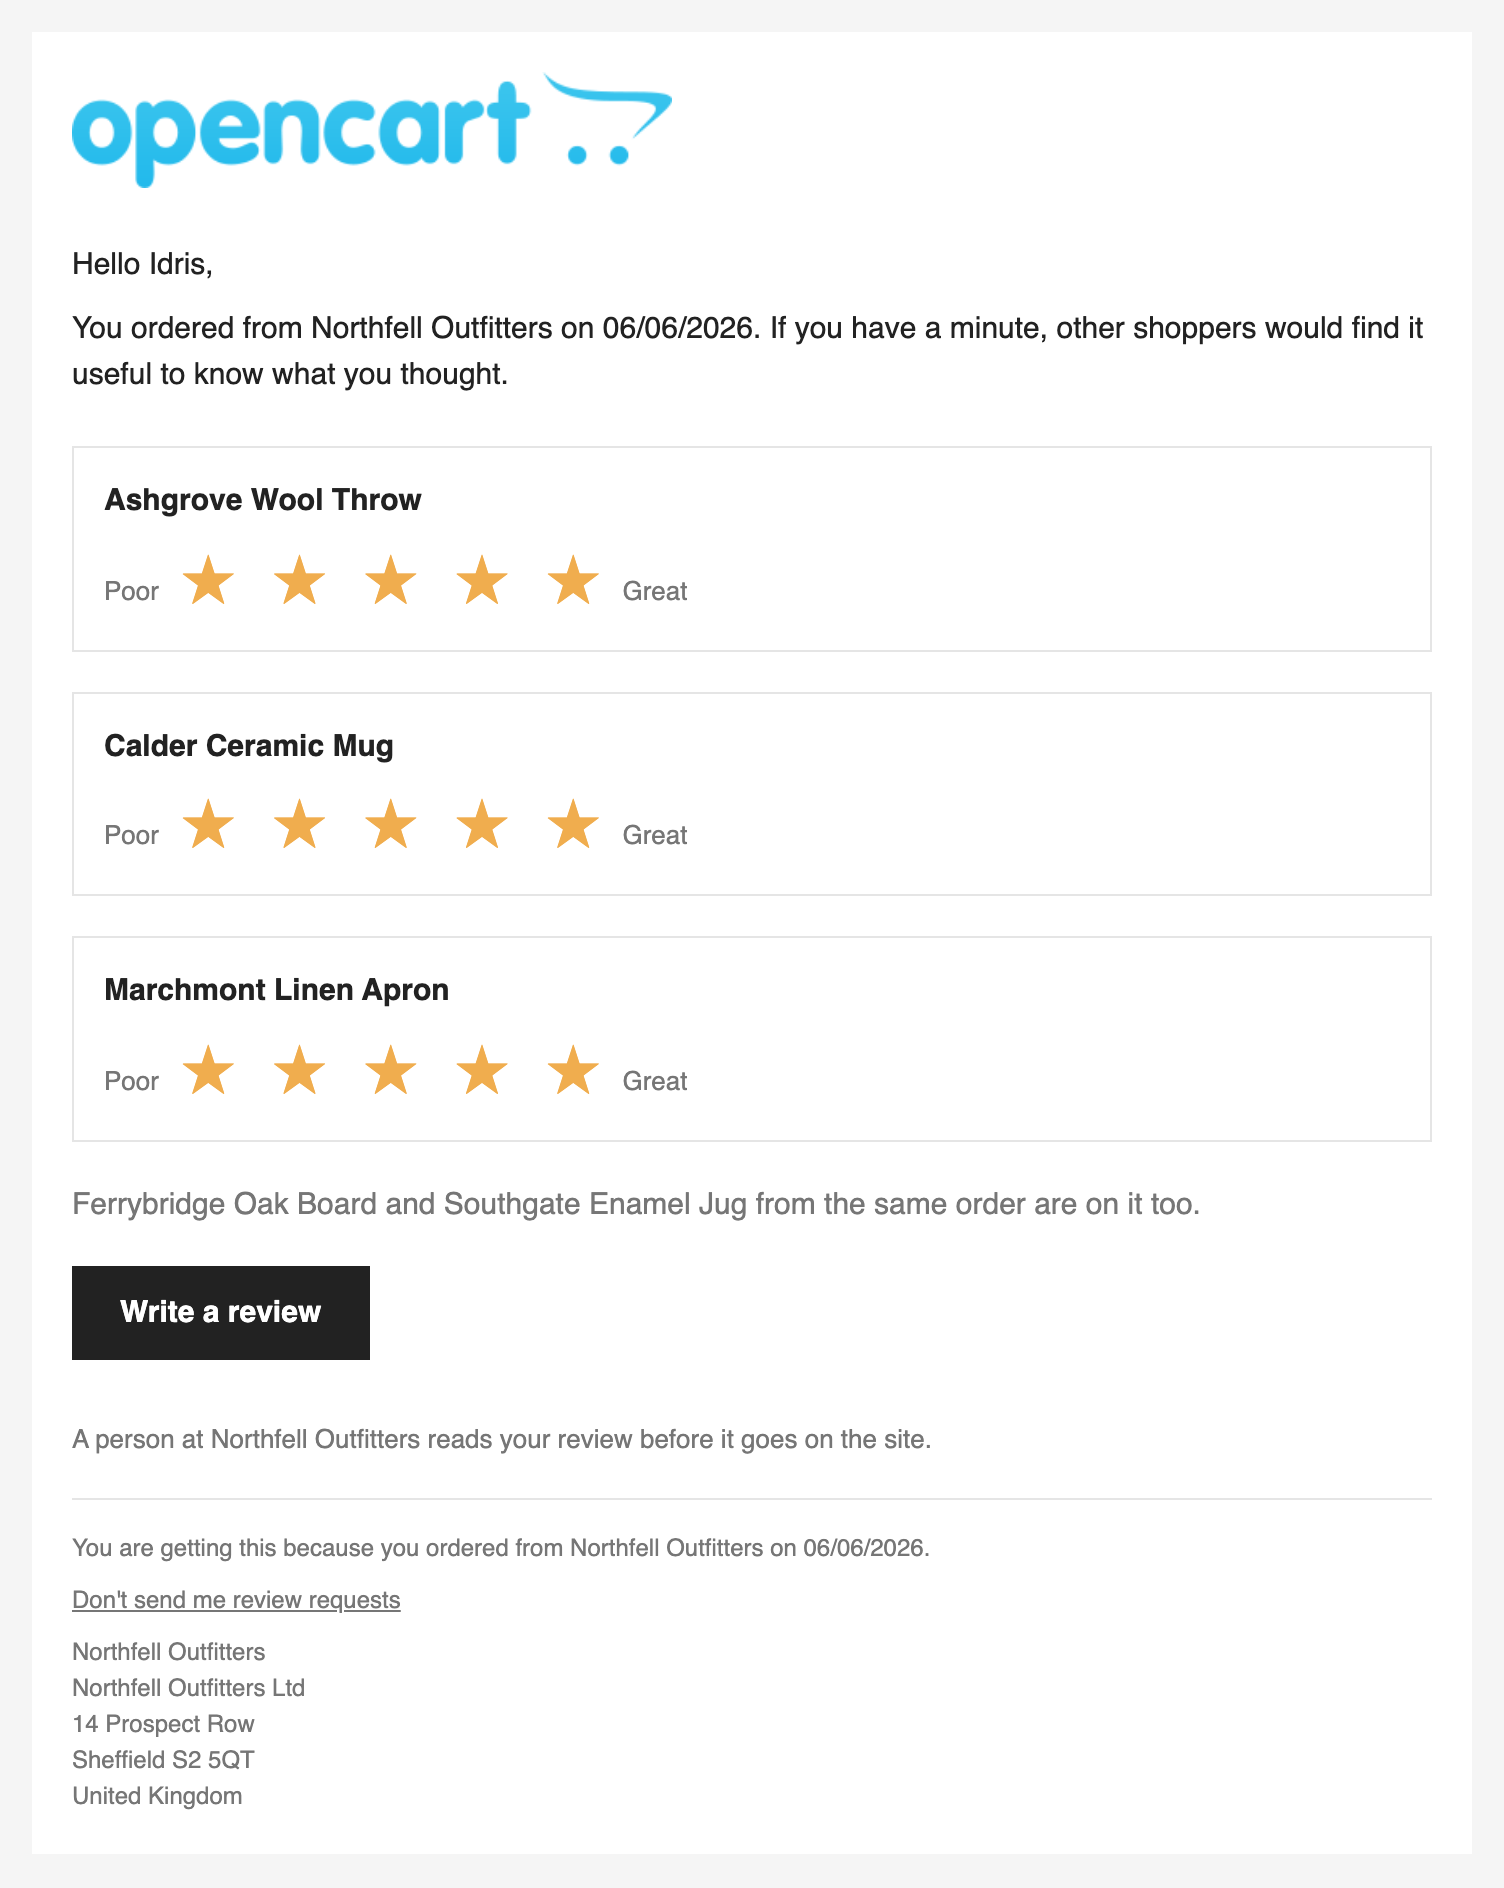
The email arrives with a card for the first few products on the order (the rest are named in a sentence) and a star row on each card you can click straight from the message. Whichever star they press is filled in for them on the page that opens.
4. Write the review as the customer
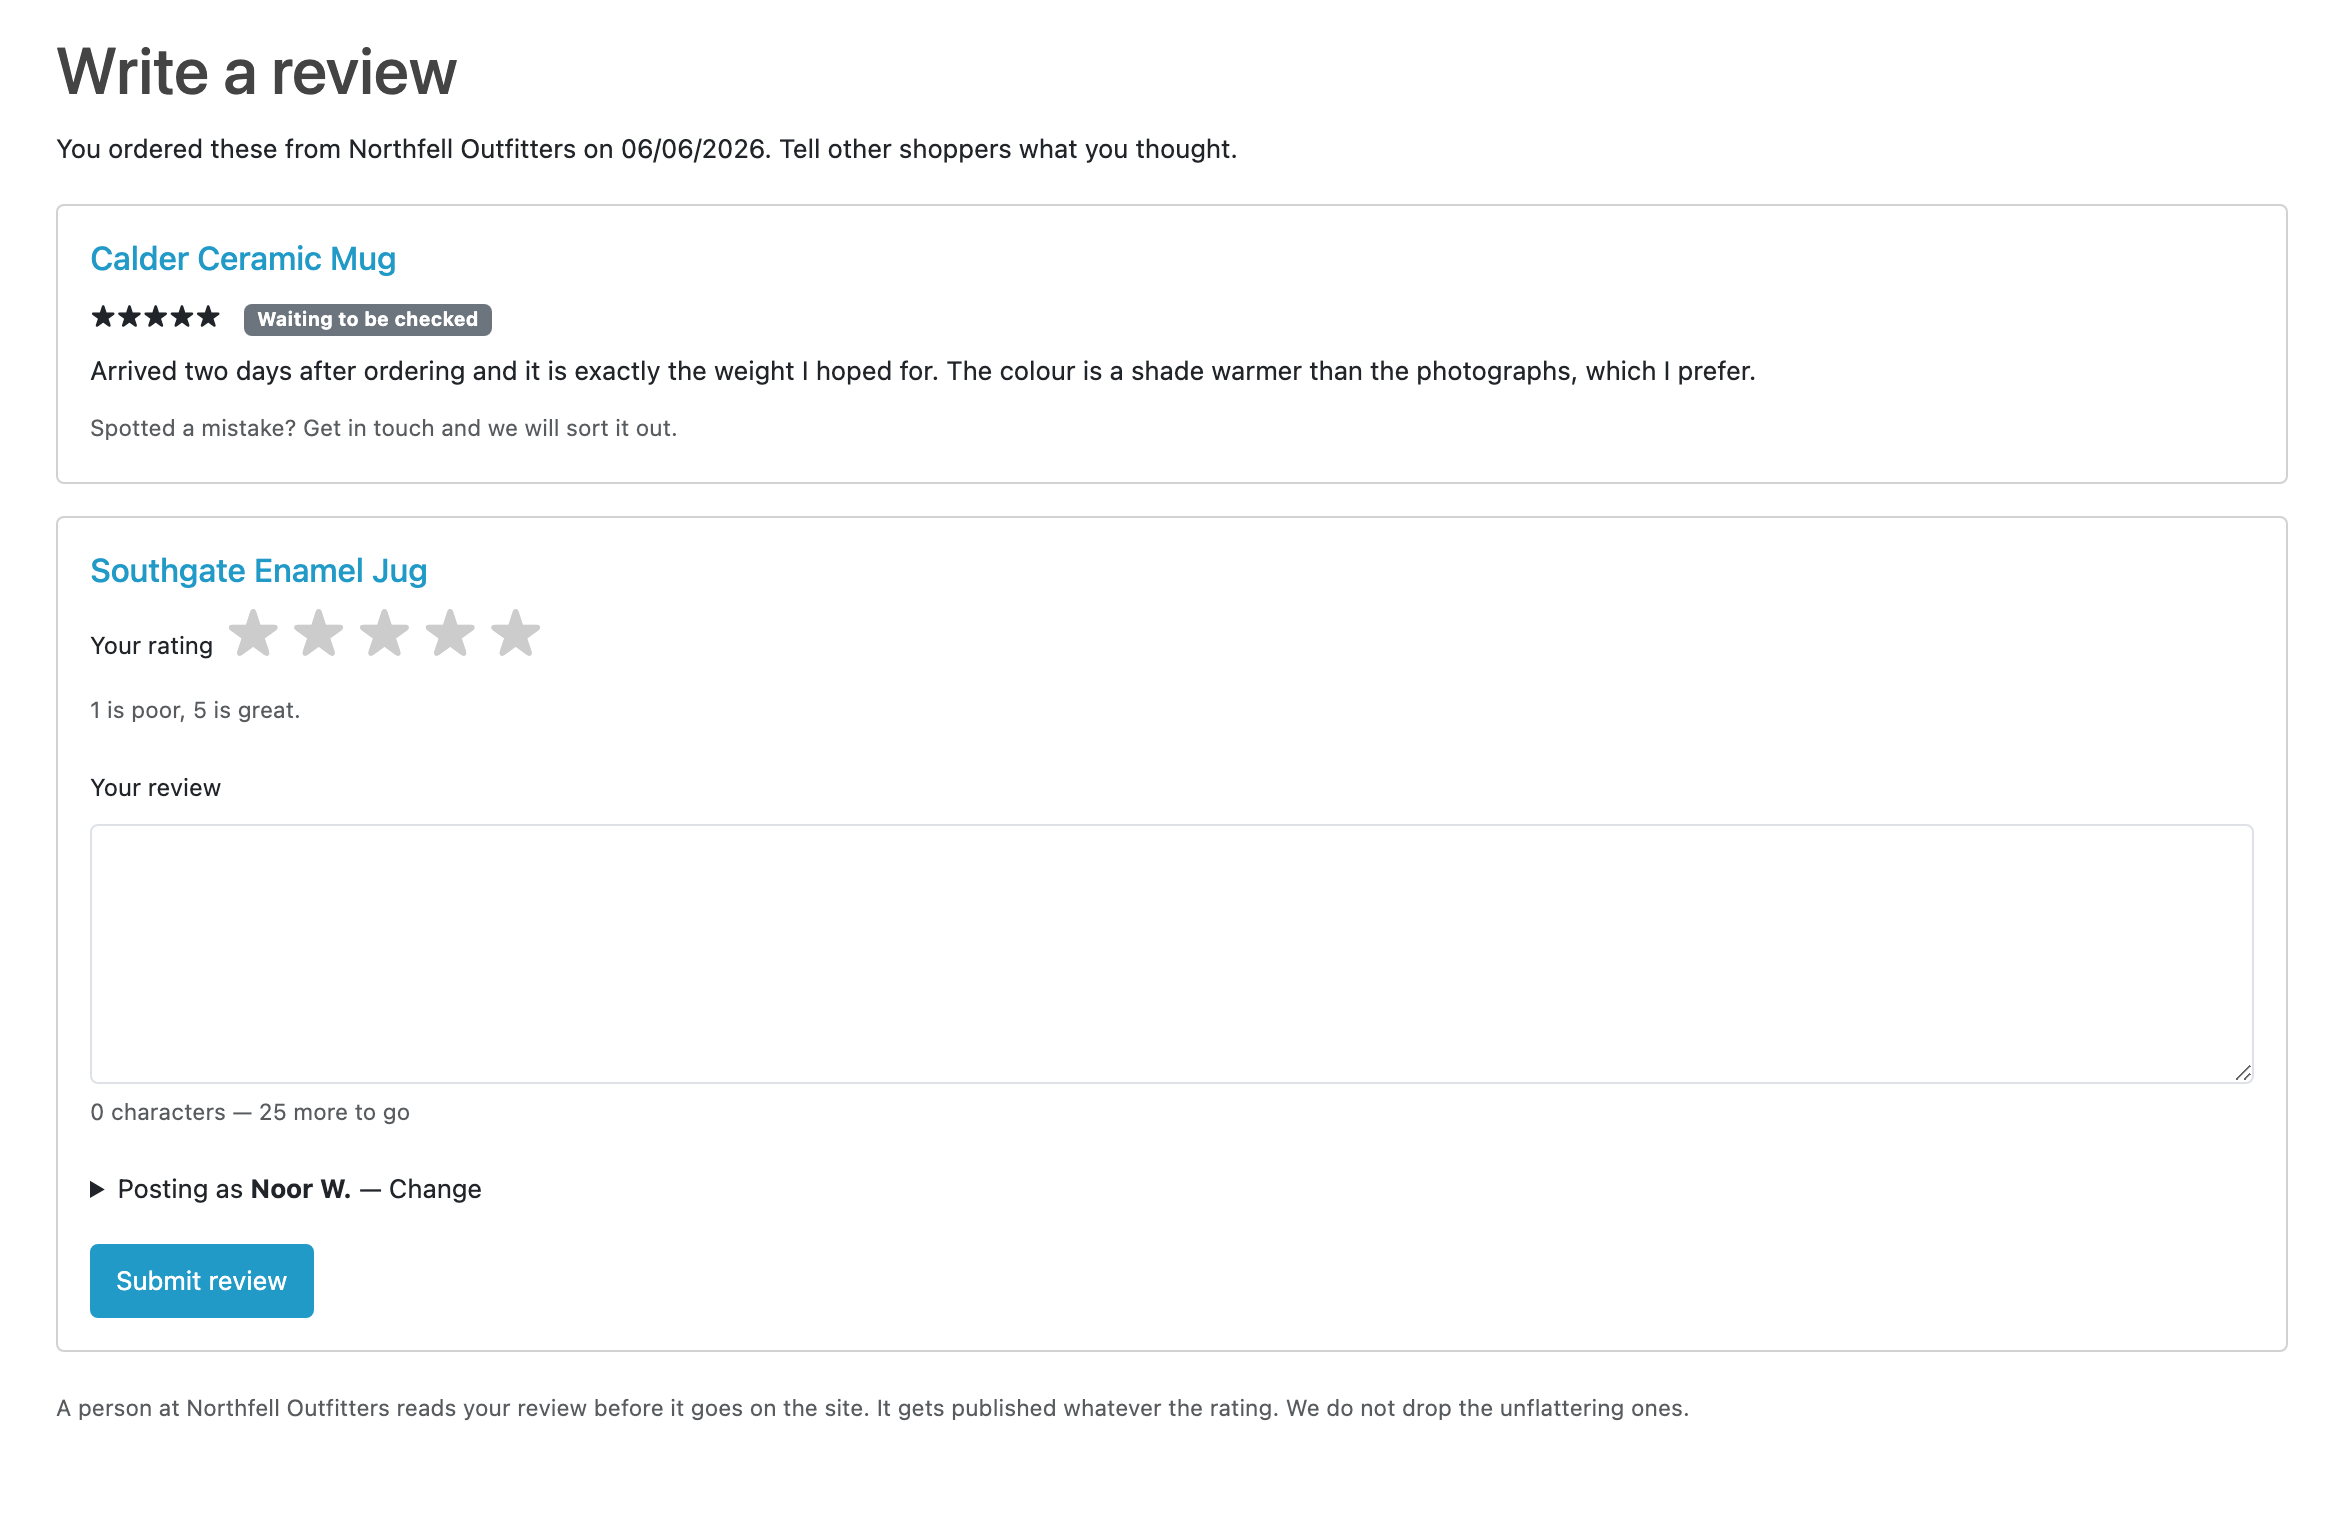
Follow the link. There is no login and no captcha: the link itself is the proof, which is what makes the badge honest. Pick a rating, write at least twenty-five characters, and submit. One product at a time: partial completion is the ordinary case and each card submits on its own.
The card comes back saying the review is waiting to be checked, and the cards you have not done yet are still there:
5. Approve it
The review is now in Catalog → Reviews, exactly like a review typed into the form on the product page, because this extension writes through OpenCart's own model rather than around it. Approve it.
On OpenCart 4.1, the product's star average does not move until you press the Sync button on that same screen. That is core's behaviour, not this extension's, and the Requests tab says so beside your requests.
6. Look at the product page
The review is there with Verified purchase beside the name, and the disclosure line beneath the list explaining what that mark means and how you handle reviews. Both are required reading for a shopper and both ship written; you can put them in your own words, per language, on the Settings tab.
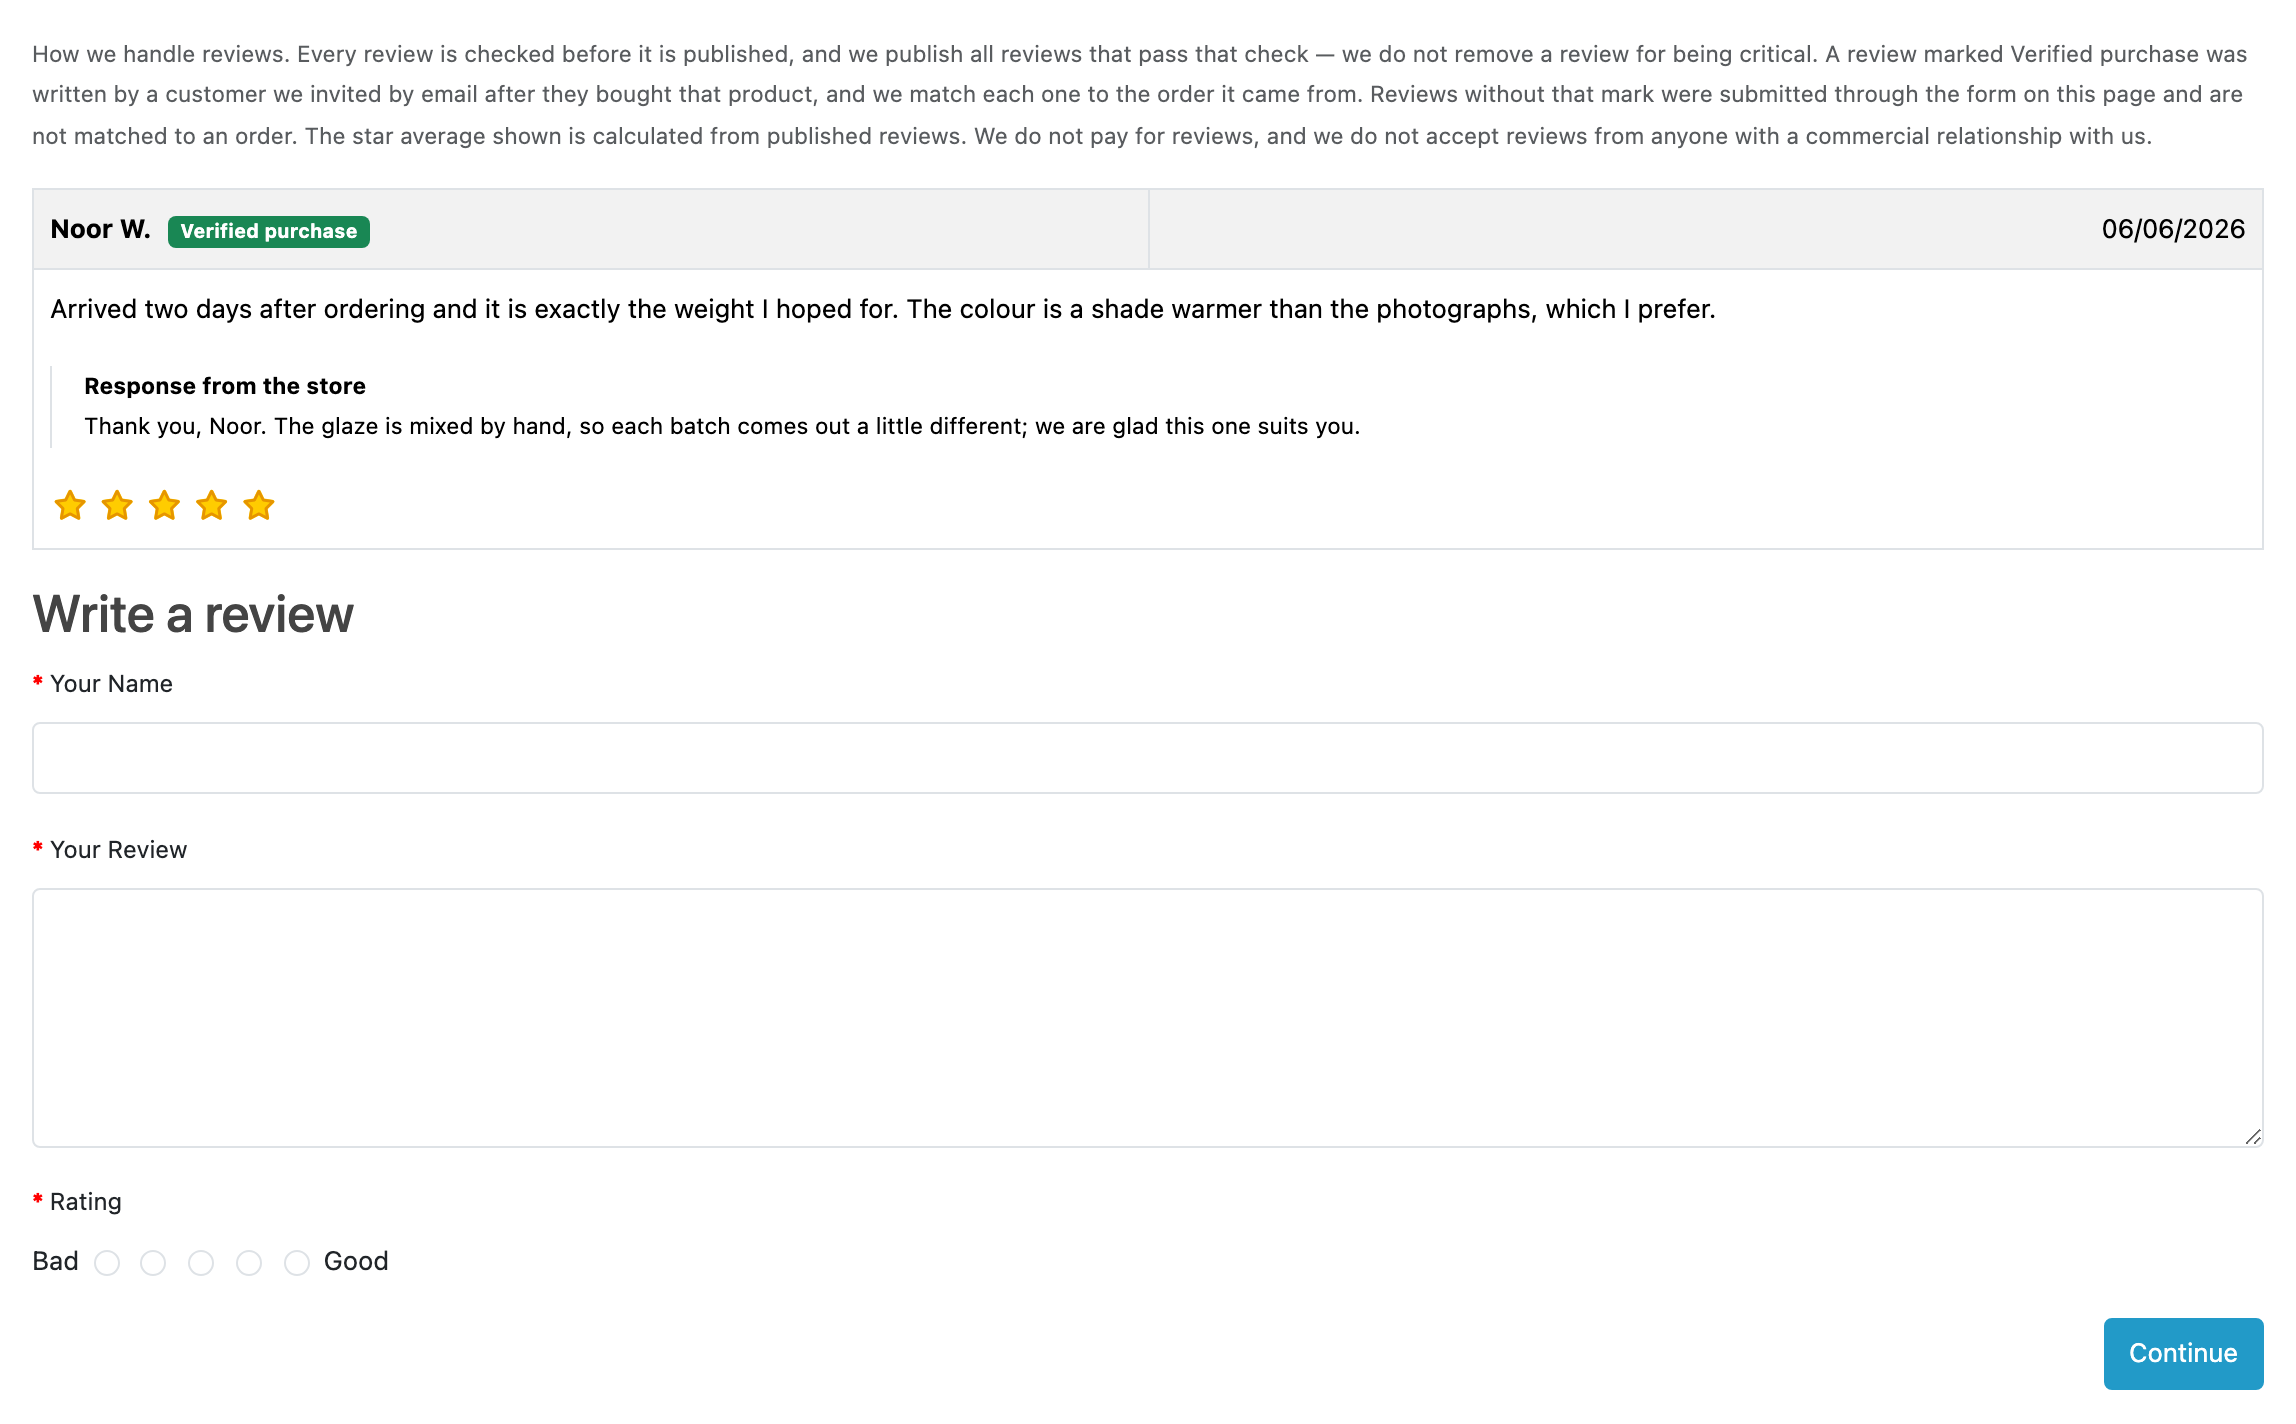
If the badge is missing, the badge line of the checklist says why. The most likely answer is a theme whose review template has nowhere to put it.
Then what
- Set the delay back to something realistic before you point this at customers.
- Read limits and guarantees, particularly what the badge does and does not claim.
- If you want the customers who bought before today, that is an initial collection: asking your back catalogue.